Pages

Showing posts with label Blogging. Show all posts

Sunday, October 23, 2011

AUTOMATICALLY IMPORT BLOG POSTS TO FACEBOOK FAN PAGE

First of all, you will have to login to your Facebook Fan Page, then click "Edit Page" as shown in the picture below.


Next, you will come to a page like the picture below. Then, click on "Edit Import Settings" as shown in the picture below.

After clicking on "Edit Import Settings", you will reach a page where you can paste your blog's RSS link to import your blog posts automatically to Facebook Fan Page wall. You will reach to the page as shown below.


Once you reach the page as shown in the picture above, click on "Apps" and then go to "Notes", click "Go to App". This is the apps that will do the automated import of blog posts for you.

You will reach a page as shown above, you will have to paste your blog feed URL into the text box "Web URL". Make sure you "tick" on the "By entering a URL, you represent that you have the right to permit us to reproduce this content on the Facebook site and that content is not obscene or illegal."

Then, click on "Start Importing".


Finally, you will reach a last page as shown above for confirmation purpose. Click on the "Confirm" button, then you have completed the setup.

Now, each time you update your blog with new posts, it will be automatically imported into your Facebook Fan Page and all the posts will be displayed on the Fan Page Wall. And, of course, all the fans of your Facebook Fan Page will get the notification of updates.

Saturday, August 20, 2011

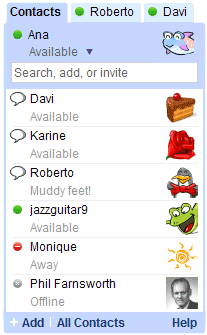
Add Google Talk To Your Blog


Google Talk, long a fixture in Gmail, can now be added to your blog as a gadget.

The Google Talk Gadget lets you send instant messages, transfer files, make voice calls (to other Google Talk users) and leave voicemail messages. If you paste a Picasa Web Album or YouTube URL into a chat session, the gadget gives you an instant preview of the photos and videos.


use that link....>>>  http://beta.blogger.com/add-widget?widget.title=Google%20Talk&widget.content=<iframe%20width%3D"234"%20frameborder%3D"0"%20src%3D"http%3A%2F%2Ftalkgadget.google.com%2Ftalkgadget%2Fclient%3Ffid%3Dgtalk0%26relay%3Dhttp%253A%252F%252Fwww.google.com%252Fig%252Fifpc_relay"%20height%3D"350"><%2Fiframe><p%20style%3D"margin%3A-8px%200">%26nbsp%3B<a%20style%3D"font-size%3A60%25%3Btext-decoration%3Anone"%20href%3D"http%3A%2F%2Fblogger-templates.blogspot.com%2F2007%2F03%2Fadd-google-talk-to-your-blog.html">Add%20To%20My%20Blog<%2Fa><%2Fp>

Sunday, June 5, 2011

How to Add and Customize Your Blogger's Blockquote

As promised in my previous post about "What is Blockquote in Blogger's Blog", in this post I will share with you the way to add a blockquote to your blogger's blog and customize the blogger's blockquote to make it look like Earn Money From Blog's blockquote.

If you would like to have a Blogger's blockquote like my blog, then this post would be a great guide for you to get started to create a blockquote like Earn Money From Blog.

Earn Money From Blog Blockqoute:
This is Earn Money From Blog's blockquote. 
First: Add the Following code to your Blogger's blog Template:
blockquote {
background: #FFFFCC;
margin-left: 10px;
margin-right: 10px;
margin-top: 5px;
margin-bottom: 5px;
padding-left: 10px;
padding-right: 10px;
padding-top: 10px;
padding-bottom: 10px;
width: 450px;
height: auto;
border: 2px dotted #FFCC66;
text-align: left;
font-style:italic;
color: #6e6e6e;
}
Reminder: Add the codes above before the "]]></b:skin>". Look at the picture below:

Second: Save your Blogger's Template.

DONE!

Now, you can go to create a new post.
1. Type something in your post area.
2. Highlight the sentences you want to change to be blockquote.
3. Click on the "Blockquote" button. As shown in the picture below:


4. Publish and you will see your post now contain blockquote that look like mine.
Note: 
You might have notice that my Blogger's Blockquote has shadow around it. I will teach you how to add shadow to the Blogger's Blockquote in the next post. We do it one step at a time. :)

Congratulation!!! You just created a Customize Blogger's Blockquote or yourblog. 

I hope this post will be clear for you to follow.If it is too confusing, please give some comments. Thanks.

Note: 
If you find that my blog's posts are helpful for you, maybe you would want to subscribeto Earn Money From Blog. Thanks. :)

reffred by earnmoneyfromblog1

What Is Blockquote in Blogger's Blog

Have you seen blogs with blockquotes? Personally, I feel that blockquotes are amazing because they makes the blog look more alive and more approachable.

What is Blockquote?
Blockquote are snippets of memo or notes normally included in a blog post by bloggers. Bloggers normally place some short notes in their post as a highlight or important notice.

How to Insert Blockquotes?


In Blogger.com, we can insert blockquote easily using the "Blockquote" button in the post page of Blogger.com. Look at the picture above, that is the button of "Blockquote". All you need to do is to Select the part of your blog's post and click the Blockquote button. Then, the part of yourblog's post will become Blockquote.

Please continue reading to read about Blogger's Blockquote.


Examples of Blockquote:


I have found 2 examples of blockquotes using Google. And the image below shows the example of Earn Money From Blog's blockquote.


reffred byearnmoneyfromblog1

What is Alexa Ranking

t has been awhile I didn't write anything about Alexa ranking. So, today in this post, let us go back to SEO (Searh Engine Optimization) again. Just to recap with you what is Alexa ranking and why it is important for each and every bloggers to know about Alexa ranking.
Notes:
Earn Money From Blog is going to go through a major restructure and overhaul. Please stay connected to Earn Money From Blog for a more exciting experience of Making Money From Blog. 
What is Alexa Ranking?
Alexa is created in the year 1996. Alexa provides users with their own Alexa toolbar which enable very comprehensive web crawling and provide quite accurate information about almost all the websites around the Internet. Alexa created their own ranking system to give a rank known as Alexa Rank to all the websites crawled by Alexa. Alexa Ranking is a ranking used by a lot of webmasters to gauge the ranking of their site as compared to all other sites.

Why Alexa Ranking Is Important?
Alexa Ranking is important because it provides webmaster the ranking details about their site as compared to other sites. Alexa also provides a lot of other information about websites such as keywords, site linking in, traffic and more. Basically,Alexa ranking shows the popularity of your blog as compared to other blogs. Theoretically, the higher your Alexa ranking, the more visitors your blog is getting as compared to lower ranking blogs.

Please continue reading to learn more about Alexa ranking

The Relationship Between Alexa Ranking and Make Money From Blog:
Since Alexa ranking shows the popularity of your blog as compared to all other blogs or sites out there, then the higher your Alexa ranking, the more the traffic your blog is getting as compared to lower rank blogs. So, your blog with high Alexa rank is potentially able to make more money as compared to lower rank blogs.

Confusing? Let me give you an example:
I found that one of the blog with Alexa rank of 100,000+ Alexa rank is making more than USD$3000.00 per month. So, Alexa ranking is an important indicator about your blog's potential to make money online.

Alexa Ranking of Earn Money From Blog:


Earn Money From Blog is ranked 367,489. It means that I still have to very long way to be ranked at least 100,000 in Alexa. I am hoping to see some improvement in ranking for Earn Money From Blog soon.

How is your Alexa Ranking? I will write another post about Improving Alexa Ranking of your blog soon.


reffred by earnmoneyfromblog1

How to Add Shadow To Your Blogger's Blockquote

I have written about "How to Add a Blogger's Blockquote to your Blogger's Blog" the other day. Today, I am going to share with you the way to add shadow to your Blogger's Blockquote to make your blockquote more appealingto your blog's readers.

How to Add Shadows to Your Blogger's Blockquote:
From my previous post on "How to Add a Blogger's Blockquote to your Blogger's Blog", I shared with you that you need to add certain codes to your Blogger's template to customize your Blogger's blockquote. In this post, in order for you to add shadow, you will need to add some more short codes to the previous codes to make the shadow appear in your customize Blogger's blockquote.


Firstly, your customize blockquote codes look like this:
blockquote {
background: #FFFFCC;
margin-left: 10px;
margin-right: 10px;
margin-top: 5px;
margin-bottom: 5px;
padding-left: 10px;
padding-right: 10px;
padding-top: 10px;
padding-bottom: 10px;
width: 450px;
height: auto;
border: 2px dotted #FFCC66;
text-align: left;
font-style:italic;
color: #6e6e6e;
}


Secondly, copy the codes below and paste to your Blogger's template to replace the previous codes above:
blockquote {
background: #FFFFCC;
margin-left: 10px;
margin-right: 10px;
margin-top: 5px;
margin-bottom: 5px;
padding-left: 10px;
padding-right: 10px;
padding-top: 10px;
padding-bottom: 10px;
width: 450px;
height: auto;
border: 2px dotted #FFCC66;
text-align: left;
font-style:italic;
color: #6e6e6e;
  -moz-box-shadow: 0px 5px 15px #ccc;
  -webkit-box-shadow: 0px 5px 15px #ccc;
  box-shadow: 0px 5px 15px #ccc;
}

Finally, save your template.


That's it. Now, your customize Blogger's blockquote will look just like:

Note: 
If you find that my blog's post are helpful, you might want to subscribe to my blog by using the subscription box at the top of my blog.


referred by earnmoneyfromblog1

Thursday, May 5, 2011

How to improve the readability of your webpage ?


  1. Underline your links. Readers expect links to be underlined, so don’t disappoint.
  2. Use appropriate space between lines in a paragraph. A quick way to test this is to divide your line-height by your font-size. Ideally you want a value around 1.5.
  3. Clearly separate your post from the rest of your design.
    It should be obvious where the post starts and stops. Your sidebar,
    comments, post meta etc. should be visually distinct from the actual
    content.
  4. If you use pull-quotes, make sure they’re extremely obvious and near the top of the article. If a user doesn’t spot them quickly, they aren’t of much use.
  5. Keep it brief. Odds are that if you’ve written something in 50 words, you could probably say it just as well in 30.
  6. Use Snook’s Color Contrast Checker on your font and background colors, to ensure the combination is readable to those with visual impairments.
  7. Use a structured hierarchy in your document, e.g. Title – Intro – Heading – Text – Subheading – Text, etc. This gives your page a more logical flow.
  8. Refrain from breaking up posts with adverts in the middle. This will interrupt the readers thought train.
  9. When styling italics and bold, there is usually no need to change their color. Doing so will only confuse readers about what is and isn’t a link.
  10. Use semantic markup, i.e. h1h2h3 for headings, strong for bold etc. Many of your readers will be reading your content in a feed reader, where your <span class=”myheading”> will have no effect.
  11. Use post images at the start of the post. In most cases, their purpose is to draw users into an article. Naturally, they do this best at the top of the article.
  12. Blocks of text are bad. Nothing scares a web user away more than a wall of text. Liven things up a little!
  13. Left aligning is usually best. Very rarely is
    centered or justified text going to look better, and I can’t think of
    any time when right aligning is the best choice.
  14. Take care with text wrapping. Depending on how
    your text wraps around an image, you may want to rephrase the text, or
    resize the image to let things sit better.
  15. Headings and subheadings must stand out. One of
    the major benefits of using headings is that readers can scan down and
    see exactly what is in the article. This only works if the headings
    stand out, so feel free to use larger fonts, underlines, colors or
    whatever else is necessary.
  16. Know when to use an ordered list, and when to use an unordered one. If your bullets are in a particular order, then number them.
  17. Indent your lists. Show that they aren’t just more paragraphs.
  18. If a certain image plays an integral part in your post (e.g. a diagram or chart), then center it, and skip a line before and after. This shows that the image is a part of the article, not just a decoration.
  19. Remember that your posts may not always be read on screen. Set up a print stylesheet to keep your articles looking good on paper as well.
  20. When choosing what font to use, choose a common font that everyone has.
  21. If you add a “PS – I forgot to mention that xyz…” to your post, style it in italicsto show clearly that it is an addition to the original post.
  22. Highlighted phrases should be the same font-size. Changing the font size will change the height of that particular line, breaking the flow.
  23. DON’T USE ALL CAPITALS ON BODY TEXT. Making all of the letters a
    similar size reduces the different between them, making it much slower
    to read.
  24. Don’t use SnapShots on your links. Whilst the feature may seem cool the first time, it becomes a pain in the neck the rest of the time. The pop-up covers a good few lines of text every time you accidentally hover over a link.
  25. Keep lines to a reasonable length (Under 100
    characters). Liquid layouts often cause the content area to stretch on
    wide monitors, making reading much more difficult.
  26. Too many paragraphs is better than too few. When
    writing on paper, paragraphs might commonly be 4 or 5 sentences long.
    On the web, shorter paragraphs of just 2 or 3 sentences are common
    because they present the point of the paragraph in a nice, bite-size
    chunk.
  27. Keep your sidebar short. The sooner your sidebar ends, the sooner it will stopcompeting with the article for attention.
  28. If you use pagination (Splitting one post onto several different pages), then make sure the post navigation is clear and easy to use. Also, begin the post with a quick table of contents so that users know what they can find.
  29. faint gray color works well for that information
    that has to be there, but isn’t crucial (e.g. the post date, author
    etc.). The faint color means the line won’t draw attention.
  30. Use the acronym HTML code to expand acronyms that readers may not all be familiar with. Use CSS to style the acronym with a dotted bottom boarder (The common convention).

There is a lot that can be done, and that’s only the visual aspects. Just think of how much your actual wording matters.


Essential Blogger Tools, Widgets and Templates


Free Blogger templates

There are two systems available for Blogger templates: the “Classic” HTML based templates, and the newer XML based “Layouts” templates.
Don’t know which style of template you are using? There’s a simple way to find out: if you have a layouts section in your Blogger dashboard where you can move widgets around, you’re using the XML based layouts templates. In cases where you have to edit the HTML to change the content of your sidebar, you’ll be using a “Classic” template.
For either template system, there are loads of great, free templates available to use. Here is a selection of some of the best resources, organized by template type:

XML/Layouts Templates

  • Blogger-Templates: A resource point for some of the best Blogger templates around, which also includes some tutorials for template modifications.
  • Blog and Web: A great resource for decorative templates which have been converted from popular Wordpress themes.
  • SuckMyLolly: looking for some unique, feminine templates? The free selection from this site are as candy sweet as the name suggests!
  • Better in Pink: A stylish selection of feminine designs.
  • Final Sense: A huge selection of free templates available here, though these are often simpler and image based variations.
  • Jackbook: Features a good selection of Wordpress conversions. Jacky is also on a mission to showcase 365 templates from various authors over the next year.
  • Zona Cerebral: this site features some of the most beautiful Blogger templates I have ever seen!
  • Blogger Buster Designs: A selection of unique two and three column templates designed for Blogger.

Classic Blogger templates

  • Isnaini: A huge selection of two column templates and unique designs
  • BloggerTemplates.org: A small but great selection, including some which have ajax-powered menus
  • Gecko and Fly: Original and highly functional templates with a professional appeal
  • Blogger Templates by Caz: here you will find some useful and utterly beautiful templates!
  • Templates for Blogger: Another useful selection of classic templates, featuring both professional layouts and zany designs.
  • Pannasmontata Templates: Stylish and unique templates for free download.
  • PsycHo: A free layout generator to create compliant classic templates with ease.

Blogger Tools

Looking for useful tools to enhance your blogging experience? Then look no further! Here is a selection of useful tools you could use for posting, publishing and customizing with Blogger:
  • Blogger Mobile: Start a MoBlog, or post directly from your mobile phone
  • Mail-to-Blogger: You can also post to your Blogger blog via email (great foriPhone users too)
  • BlogThis! Bookmarklet: Have you ever found a post or site which you wanted to write about straight away? Install this nifty bookmarklet in your browser, and you can post with just one click.
  • Blogger in Draft: Test the latest widgets and developments of Blogger before they are released to the public.
  • Redirect your feeds through Feedburner: Now there’s no need to use auto-discovery tags to help visitors find your blog feeds. Simply redirect them through Feedburner with the one-click installation!
  • Blog via Flickr: You can post your Flickr photos directly to your blog, and can even post directly from your camera phone (great for those whose mobile phone network is not covered by Blogger Mobile)
  • Haloscan: By default, Blogger doesn’t allow you to send trackbacks when you post. By using the free service from Haloscan, you can send trackbacks to other blogs, and also display the trackbacks which have been sent to you. Other free features for Blogger users include external commenting and ratings systems for your blog posts.
  • w.Bloggar: a free Windows based application which you can integrate with your Blogger blog to post remotely. One version allows you to install on a pen drive to post while you are away from home.
  • Blogger for Word: Using this free download, you can publish to your blog, save drafts and edit posts from within Microsoft Word.
  • Blogger Developers Network: Information for developers interested in creating applications, templates and widgets for the Blogger framework.
  • Blogger Javascript Client Library: Create Blogger applications and mashups that can read and write data from your Blogger blogs with no server-side programming required!

Useful widgets for Blogger layouts

Those who use the Blogger layouts system can now add widgets to their template with ease. Here are some of the most useful widgets for Blogger blogs:
  • Recent comments: this widget is so easy to configure and install. Simply enter your the details for your blog, choose how many comments and the excerpt length to display, then click the button to add this widget to your blog!
  • Recent posts: Display extracts of your most recent posts in your sidebar.
  • Tag Cloud: now Blogger users can feature their categories in “Tag Cloud” form. Slightly more complicated than your average widget, but a great display once installed.
  • Archive calendar widget: Fancy having a Wordpress-style calendar in your sidebar which readers can click to read your post for the day? Phydeaux shows us how this is possible to achieve in Blogger too!
  • Random post: Adds a link to your sidebar which, when clicked, will take your reader to a random post from your archives
  • Table of contents: Use this widget to list all of your posts in an expandable widget above your content.
  • Tab View widget: I love the widgets in some Wordpress templates which allow you to view posts by category. Here Hoctro shows us a method which could be used to display your Blogger category posts in the same way.
  • Simple search widget: add a search box to your sidebar for readers to easily find the content they need.
  • Flickr Badge: Using this generator, you can easily create a photostream of your latest Flickr photos to display anywhere in your blog.
  • Widgetbox: find a whole host of widgets here which can be quickly added to your blog layout.
  • RockYou!: Social widgets, including noteboards, slideshows and talking avatars which can be used in Blogger blogs.

Yet more resources for Blogger!

For more general information about Blogger, you may want to take a look at some of these resources:
  • Blogger Help: The official site for Blogger-related assistance
  • Blogger Help Group: Ask questions and get help from other members of the Blogger community.
  • Blogger Buzz: The official blog about Blogger, featuring news, recent features and noteworthy information for those using this platform.
  • Blogger Status: Stay informed about developments, upgrades, outages and related issues.
  • Known issues for Blogger: The latest news about Blogger problems, what’s getting fixed, and what’s been taken care of, direct from the Blogger team.
  • Blogger Hacks Wiki: Want to find out if a particular hack is possible in Blogger? If it is, then most likely you’ll find it listed here.


Trick for displaying Number of Comments in your WordPress Blog


Place below code where you want to display your comment count:
<?php
$numcomms = $wpdb->get_var("SELECT COUNT(*) FROM $wpdb->comments WHERE comment_approved = '1'");
if (0 < $numcomms) $numcomms = number_format($numcomms);
echo "There's ".$numcomms." total comments on my blog";
?>


New Official Twitter Button To Your WordPress Blog


As Twitter launched its official tweet button, many
sites have already implemented it. Tweetmeme button never showed the
correct count for tweets, but with this new Official Tweet Button from
Twitter, we hope to have the correct tweet count for our tweets. This
simple tutorial will help you integrate three different types of Twitter buttons with counters and without counters. Hope this helps.
retweet buttons

One Step Tutorial:

Place below code where you want to display your Official Tweet Button:
Type 1
retweet button type1

<a href="http://twitter.com/share" class="twitter-share-button" data-count="vertical" data-via="TutZone">Tweet</a><script type="text/javascript" src="http://platform.twitter.com/widgets.js"></script>


Type 2
retweet button type2

<a href="http://twitter.com/share" class="twitter-share-button" data-count="horizontal" data-via="TutZone">Tweet</a><script type="text/javascript" src="http://platform.twitter.com/widgets.js"></script>


Type 3
retweet button type3

<a href="http://twitter.com/share" class="twitter-share-button" data-count="none" data-via="TutZone">Tweet</a><script type="text/javascript" src="http://platform.twitter.com/widgets.js"></script>